How to Build Simple, Removable Van Cabinets (No Advanced Carpentry)
Skip the Permanent Mess: Why Removable is King
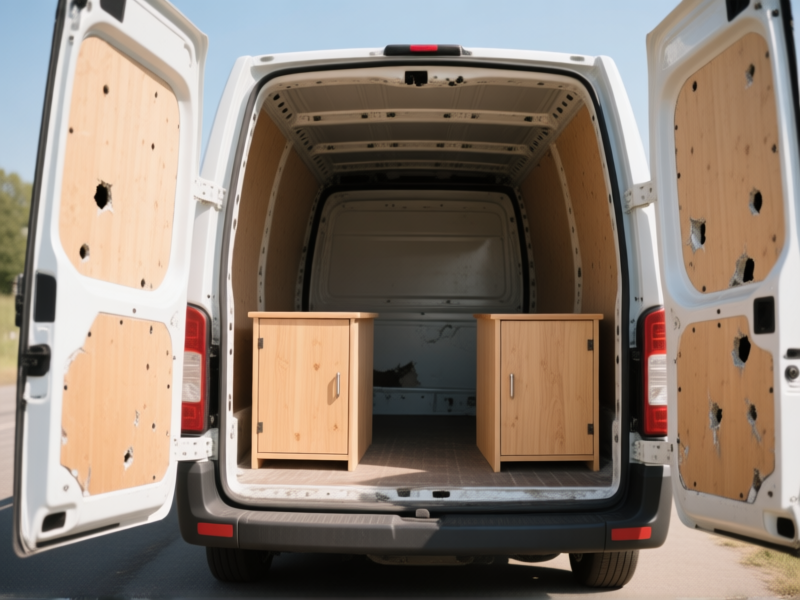
Let's be real. The idea of drilling a hundred holes into your van's perfectly good metal skin is terrifying. What if you hate the layout in six months? What if you sell the van? Most builds lock you in forever. We're not doing that. The goal here is storage that feels rock-solid on the road but pulls out in ten minutes if you need the empty shell back. It’s freedom. And it’s way easier than you think.
The "No-Fancy-Tools" Shopping List
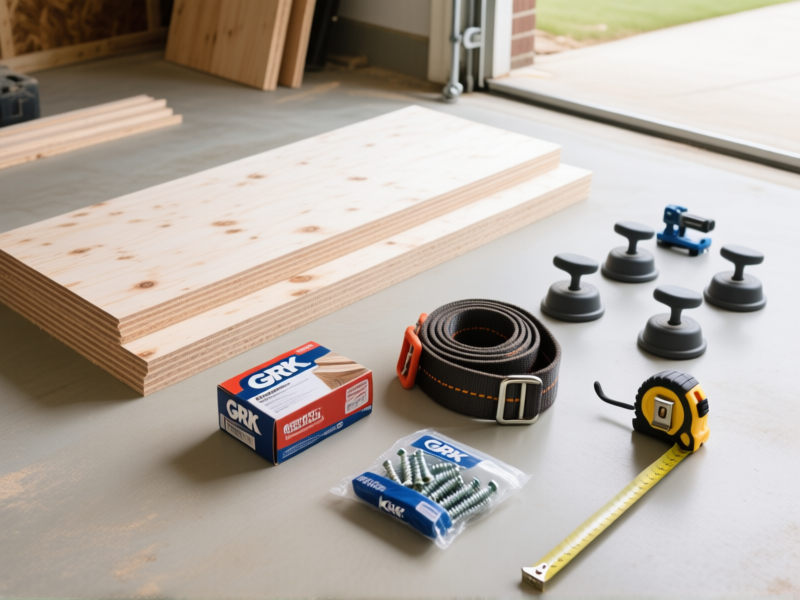
You need plywood. Half-inch birch ply is the sweet spot—strong, not crazy heavy, and looks decent. You need screws. Get GRK or Spax cabinet screws; they pull stuff together without pre-drilling most times. The magic? Heavy-duty ratchet straps and cheap furniture dollies from Harbor Freight. The straps are your "frame," the dollies are your floor. A basic pocket-hole jig is a game-saver for clean joints. A circular saw and a drill. That's the core of it. Don't overcomplicate.
Cut Once, Measure Twice (The Easy Way)
Plans suck. Your van is unique. So here's the system: Mock everything up with cardboard first. Seriously. Tape together old Amazon boxes until you have a 3D model of your cabinet. Sit with it. Live with it for a day. Does it block a window you forgot about? Is the access awkward? Then, and only then, transfer those dimensions to plywood. Cut all your panels at once. Label them with painter's tape. "Left side", "top shelf", etc. This isn't a fine furniture shop; it's a van. Precision is good, perfection is the enemy.
Assembly: Glue, Screw, and Cuss a Little
Dry fit everything. Always. Then, wood glue on every joint. It’s not just for strength; it stops squeaks. Clamp it if you have clamps. If not, use some weight. Now screw it together with those cabinet screws. Use the pocket-hole jig for any faces you don't want visible screws on. This is where it starts looking like a real thing. It’s a box. A fancy, very useful box. Don't stress about minor gaps. We're building function. Character comes from dings and coffee stains later.
The Genius Part: Installing Without a Single Drill Hole
Here’s where we cheat. You know those factory tie-down points in your van's floor? That’s your anchor. Place your cabinet on the furniture dolly. Position it exactly where you want it. Now, take a heavy-duty ratchet strap. Loop it over the cabinet (add a protective block of wood to avoid crushing), hook the ends into the floor points, and crank it down. Seriously. Crank it. That cabinet isn't going anywhere, even on washboard roads. The dolly gives it a raised base and lets you slide it out when the strap is off. Zero holes. Maximum security.
Slap on a Finish and Call it Done
You could leave it bare. But a little finish makes cleanup easy. A quick sand with 120-grit paper to knock off the splinters. Then wipe on a coat of hard-wearing polyurethane or a simple beeswax oil. It’s not about being pretty; it’s about surviving spilled chili and wet dog gear. Let it dry. Load it up. That’s it. You built custom storage without welding, without complicated framing, and without making a single permanent change to your ride. Go use it.