How to Install Maxxair Fans and Roof Vents Yourself (Save $500+)
Think a Pro Install is Your Only Option? Think Again.
Let's be real. Getting a quote for a fan install can be a punch to the gut. Five, six, sometimes seven hundred bucks just for labor? No thanks. Here's the truth they don't want you to know: installing a Maxxair fan is a weekend project, not a magic trick. If you can trace a circle, turn a screwdriver, and follow basic instructions, you can do this. That $500+ stays in your pocket. Let's get started.
Gear Up: Your DIY Arsenal (It's Not Scary)

Don't just grab a rusty saw from the garage. The right tools make this clean, safe, and actually enjoyable. You'll need a jigsaw (a cordless one is perfect), a drill, a 1-inch hole saw, basic sockets, wire strippers, and the two VIPs of roof work: butyl tape and Dicor self-leveling lap sealant. That's it. This isn't a surgical suite. It's a well-stocked toolbox. Pro tip: grab a helper for the heavy lifting—the fan unit itself isn't light, and four hands are better than two when you're wrestling it onto a roof.
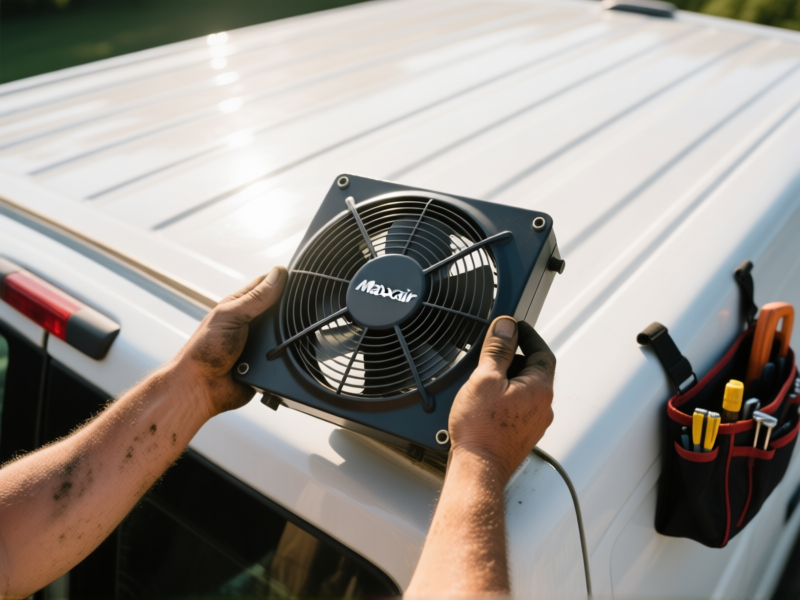
The Moment of Truth: Cutting the Big Hole
This is the part that freaks everyone out. Taking a saw to your vehicle's roof is… committing. But precision is your best friend here. Measure twice, three times, then measure again. Use the fan's template, mark it clearly, and double-check you're not about to hit a roof rib. Drill a starter hole for your jigsaw blade, take a deep breath, and go for it. Steady, smooth cuts. The metal cuts easier than you think. Wear those safety glasses—nobody looks cool with metal shavings in their eye.
Sealing the Deal: Keeping Your Home Dry
Listen. The fan motor could die in five years. Your seal? That needs to outlive the van. This is the single most important step. Scuff the roof paint around the hole for better adhesion. Lay down a solid, continuous snake of butyl tape on the fan's flange. Set the fan. Bolt it down tight, squeezing that tape into a perfect waterproof gasket. Then, drown the flange screws and the entire perimeter in Dicor. Be generous. It self-levels into a smooth, water-shedding dome. A leaky roof ruins everything. This step avoids that.
Wiring It Up: It's Just Two Wires (Really)
If electricity makes you nervous, I get it. But this is simple DC power, not rewiring your house. You're running two wires: positive (red) and negative (black). Find a clean path from your roof down to your fuse box or battery. Use proper gauge wire and always, always fuse the positive line right at the source. Connect to a switched circuit if you want fan control with the ignition, or direct to the battery for a constant "always ready" mode. Use crimp connectors, not twist-and-tape. Make it tidy. You'll sleep better.
Hit the Switch & Feel That Breeze
Okay. The bolts are tight. The Dicor is curing. The wires are connected. This is the good part. Flip the switch. Hear the gentle hum. Feel the air start to move. That stale, built-up heat? Gone. That's not just airflow. That's the sound of success. That's the feeling of $500 still in your bank account, a new skill learned, and a van that's infinitely more livable. Go ahead, crank it up to ten. You earned it.