How to Seal Your Van Roof and Windows (Prevent Costly Leaks)
The Sneaky Leak: How Water Finds Its Way In

Okay, let's be real. You're not staring at a geyser in your van. It's worse. It's that one damp patch in the corner that appears two days after it rains. The mystery. The mildew smell you can't quite place. That's the enemy. Water is patient and creative. It'll travel sideways, follow a seam for feet, and drip down a wire to ruin your day. Your job isn't to stop a monsoon. It's to stop *that*. The slow, expensive, rot-inducing trickle. First rule of leak club: find it. Get inside with a flashlight while a buddy hoses the roof down. Mark every weep, every hint of moisture. That map is your battle plan.
Ditch the Hype: Choosing Your Sealant Weapon (On a Budget)
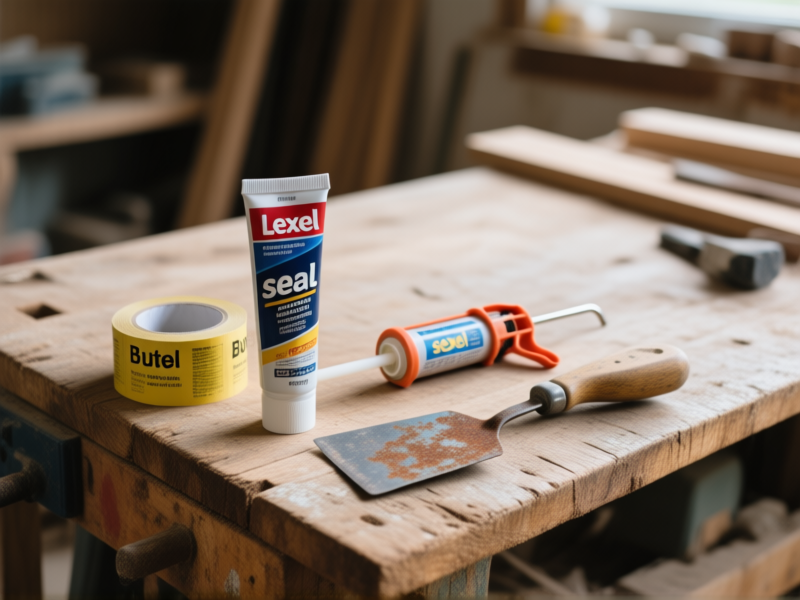
Forget the fancy brands with the off-road trucks in their ads. You need two things, maybe three. For seams and big gaps, you want **Butyl Tape**. It's like play-doh for vans. Smush it into place, it stays forever. For everything else—small cracks, sealing around vents, finishing edges—you want a **non-silicone, UV-resistant sealant** like Lexel or Sikaflex. Here's the thing: silicone is the devil. Dirt sticks to it, nothing sticks on top of it, and it fails. Spend the extra $5. The third thing? A $2 tube of **Flowable Silicone Windshield Sealant**. This stuff is wizardry for sealing the *inside* of window gaskets. Trust me.
The Messy, Beautiful Process of Actually Sealing
Prep. Is. Everything. You can have the best sealant on earth, and if you put it over dirt or old, cracked gunk, you've wasted an afternoon. Get the wire brush. Get the rubbing alcohol. Scrub every inch of the seam or area you're sealing until it's squeaky clean and dry. Actually dry. Then, apply your sealant or tape. With sealant, you want a smooth, continuous bead. Don't be shy. Use a wet finger (spit works) or a plastic spoon to tool it into a smooth, concave fillet. That shape sheds water. This isn't a beauty contest. It's a barrier. Make it thick, make it even, make it ugly. Just make it seal.
Van Windows: The Usual Suspects for Leaks
Factory windows leak. It's what they do. The gasket gets old, shrinks, and water runs *behind* it, not over it. The fix? That magic Flowable Silicone. You gently pull the lip of the rubber gasket away from the van body from the *inside*. Just a tiny gap. Then you insert the thin straw of the tube and, as you squeeze, slowly pull it along the entire perimeter. The liquid silicone wicks into the gap, filling every microscopic void between the gasket and the metal. It's not brute force. It's a tactical infiltration. Let it cure. This one trick solves about 80% of window leaks.
The Reality Check & When to Walk Away
You've done the work. You've been up on the roof, you're covered in sealant. Good. Now wait for rain. Seriously. That's the test. Check your marks. A little victory dance for dry spots is allowed. But listen. If you've got a roof full of old, failed solar mount holes or a skylight that's clearly warped, no amount of sealant is a permanent fix. Sometimes the "money-saving" move is knowing when a part needs to be fully replaced. This stuff buys you time. It patches the problem. For a year, maybe three. That's the DIY life. You're not building a submarine. You're just trying to sleep dry without going broke.