The IKEA Van Build Hack: Using Flat-Pack Furniture in Your Conversion
The IKEA Van Build: Friend or Fad?

Let's cut straight to it. Building a van is ridiculously expensive. I'm talking about the moment you price out a sheet of marine plywood and your soul briefly leaves your body. This is why the IKEA hack has become vanlife gospel for so many of us. It's not about being lazy. It's about being smart with a tight budget. You're not just buying cheap shelves; you're buying a pre-engineered, modular system that someone else already stress-tested. The trick is knowing which pieces to trust with your life on the road and which ones will turn into a pile of particleboard confetti at the first pothole.
Measure Twice, Buy Once: Your Van Ain't a Living Room
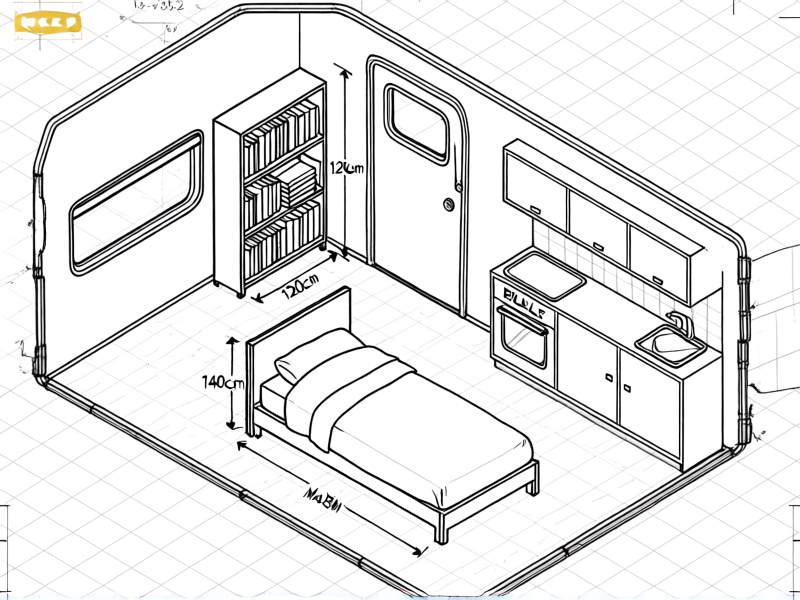
Here's the thing everyone gets wrong on their first trip to the blue-and-yellow wonderland. They forget their van is a moving, vibrating, occasionally freezing or sweltering metal box. Your planning starts with a tape measure, not the IKEA website. Get your exact interior dimensions, then subtract at least 2 inches for wall irregularities, insulation, and that universal law of "things never fit perfectly." Now, go browse. The BILLY bookcase? A classic for a reason—solid, predictable dimensions. The KALLAX cube shelf? A modular legend for dividing spaces. Fit the furniture to the van, not the other way around.
From Box to Built-In: The Assembly Mindset
Forget the little cardboard Allen key. Seriously. Toss it. When you build IKEA stuff for a house, you're fighting wobble. In a van, you're fighting inertia and gravity trying to throw your stuff through the windshield. Your new best friends are wood screws, L-brackets, and heavy-duty construction adhesive. You're not just assembling furniture; you're becoming one with the van's skeleton. Bolt everything directly into the metal ribs or your subfloor. That cute LACK side table? Screw its legs directly to the floor. That wall-mounted shelving unit? Use French cleats or massive brackets. The goal is zero movement. Zilch.
Next-Level Hacks: Think Outside the (Flat-Pack) Box
This is where it gets fun. The real magic isn't in using the furniture as-is. It's in seeing its potential as raw material. That RÅSKOG rolling cart? Perfect mobile kitchen unit—add a plywood top and you're done. The STUVA storage bins under a bed frame? They are your entire wardrobe system. But my favorite trick? Using IKEA cabinet doors as super lightweight, pre-finished wall panels or table surfaces. You're not just a builder anymore. You're a puzzle-solver. It's about seeing a $20 side table and imagining it as the perfect base for your sink.
The Honest Downsides: Where IKEA Falls Short
Look, it's not all meatballs and fairy lights. You need to know the weak spots. Most IKEA stuff is particleboard or MDF, which is basically compressed sawdust and glue. It hates moisture. If you have condensation issues, it *will* swell and turn into a sad, crumbly mess. The hardware can be lightweight. And let's be real, not everything they make will survive a corrugated dirt road. The key is strategic use. Use solid wood or proper plywood for high-stress, high-moisture areas (like a bed frame or galley counter). Use IKEA for dry storage, interior partitions, and organizers. It's a tool in your toolbox, not the whole shed.